AIEL Shop Tips
WORK BENCH SETUPS
|
|
A service shop requires some sort of platform on which to perform work.
Suggestions below discuss benches for electrical, electronic,
mechanical, and miscellaneous functions.
|

|
Topics
BENCH PURPOSES
Separate Purposes: It's good to have distinct benches for
electrical, electronic, mechanical, and miscellaneous. If you have limited
room, try to have at least two benches. Electrical and electronic work can
be combined for one of them, although one must be careful with heavy
electrical items around more fragile electronic ones. Regardless, both these
must be kept away from wood work, metal drilling and the like because
of dirt.
Big Items: A bench other than those just mentioned is to be
considered for working on large equipment. This one is lower than the
others so that large items may be placed upon it and be at a comfortable
working height. These might include dimmer racks, bars of lights, and
large electrical panels.
Leveling: Each bench should be absolutely level in all directions
to prevent items from rolling off, and to stop liquids from spreading to
other bench areas or from dripping off the edge. Some persons like a bench
to lean slightly back so that items will not roll off the front. A curb is
then installed on the remaining three edges to contain wayward parts.
However, round items will still roll some where even if they stay on the
bench; this can be frustrating. It is the general preference that items
stay where they fall, and so absolutely level is the recommended method.
Tool Support: Each bench will require tool racks or holders to
suit, but a peg-board back or wall-mount for larger tools, movable shelves,
and other items required to be close at hand are a must. Under-bench shelves
should be considered for items which might be used for the type of projects
being worked upon at a given bench. Electrical outlets will be needed for
power tools, a glue gun, a soldering iron or gun, and extra outlets for
testing purposes. A switched outlet is handy for the latter. (Study the
Work Area Power article.)
FRUGAL TIP
Can't afford to build a bench, or don't have the time
or inclination? Look on Buy & Sell and FreeCycle
websites for those old, wooden, over-size desks.
These often sell for a low price or are being given
away. You might even find one for free if you take
the time to drive around on garbage day to look.
Old desks provide a solid, non-conducting work surface,
and have multiple drawers below which can be used for
storage. Bring some friends -- those desks are heavy !
ELECTRICAL and ELECTRONICS BENCHES
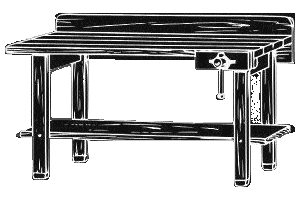
Bench Particulars: The electrical and electronics benches must
be made from a non-conducting material such as wood. Have them at about
a 1.5 metre height and attach a small vice to hold items. A tall bench
is easier at which to work when standing because one does not have to
lean over, and it puts the object of your work near eye level. If you
plan to sit all the time, consider a wooden desk for this bench.
Otherwise get a tall shop chair for the times you will be seated at
the high bench. Line the vice jaws with rubber to protect items and
also to prevent them from conducting stray voltage to the vice during
live electrical tests.
Accessories: These benches must have multimeters for resistance
and voltage testing. A variable 120 volt supply with a volt meter is a
must also. It will allow gradual voltage to be applied to a device under
test, as well as provide lower voltages for 12-volt or other lamp testing.
Use a variable transformer (auto transformer) rather than a solid-state
dimmer. The latter fails too easily with surges and they generally don't
have the smoothness or the resolution of the transformer types.
Socket Bar: An electrical socket bar is a handy thing for lamp
testing. Make it out of wood and have a row of various sockets such as
medium screw, two-pin, and bayonet, plus any others used in your equipment.
Place an illuminated indicator on it to show when it is live. This must be
still show when voltages are not at 120. Weight the bar, or make it wide
enough so as not to fall over if it is not bolted down. A socket bar is a
better method than trying to apply up to 120 volts to a lamp base with
a couple of test prods when the lamp is rolling around the bench.
Electrical for the above is covered under
Bench Power
Suggested E-Bench
Tools and Supplies
Items from this list will be selected by you to fit the equipment
most likely to be
worked upon. Try to buy quality tools; you will spend less in the long run.
- Vice
- Selection of Pliers
- Diagonal Cutters
- Utility Knife
- Wire Stripper
- Scissors
- Haemostats
- Screw Drivers
- Nut Drivers
- Wrenches
- Selection of Hook-Up Wire and Cable
- Electrical & Colour Coding Tape Selection
- Multimeter
- Soldering Iron with Holder and Solder
- Soldering Iron Spare Tips
- Crimp Tool and Connectors
- Heat Shrink and Gun
- Variable Power Supply
- Socket Bar for Lamp Testing
- Paper Towels
- Rags
- Methyl Alcohol (Methanol)
- Other Solvents
(Acetone, Laquer Thinner, Mineral Spirits, etc.)
|


|
MECHANICAL BENCHES
Bench Particulars: These benches need to be heavier in
construction as this is where the hammering, sawing, and drilling, etc.
will take place. A large vice and anvil will aid in the restoration of
metal parts, while a switched outlet will be a bonus for the glue gun.
Include a pilot light so you'll know if the gun is on or not, and be
sure it is mounted so that it can be kept away from a stray arm coming
close to the hot tip.
Vibrations: Don't attach pegboard to the back of this bench
because vibrations from the work being done will dislodge hanging items.
If the pegboard absolutely cannot be attached to the wall in behind, purchase
hangers and pegboard hardware that will securly hold the items kept there.
Even then, the noise of all those hanging items may annoy you to the point
where another hanging method for the pegboard will be devised anyway.
Electrical for the above is covered under
Bench Power
Suggested M-Bench
Tools and Supplies
Again, the items below will be selected by you to fit the equipment
most likely to be worked upon. Purchase quality tools; they will cost
less in the long run.
- Large Vice
- Anvil
- Heavy Pliers
- Heavy Cutters
- Robust Knife
- Hack and Wood Saws
- Hack Saw Spare Blades
- Scratch Awl
- Pin and Flat Punches
- Chisels
- Files
- Drill and Bits
- Glue Gun with Glue Stick Selection
- Glue Gun Drip Tray
- Soldering Gun with Solder
- Soldering Gun Spare Tips
- Soldering Gun Accessories
- Claw and Ball Peen Hammers
- Screw Drivers
- Scissors and Snips
- Wrenches
- Colour Coding Tape Selection
- Rags
- Selection of Solvents
(Acetone, Laquer Thinner, Mineral Spirits, etc.)
|

|
BENCH STORAGE
Shop Storage is covered in its own article,
but some items need to be immediately accessible to those working at
benches. These usually take the form of hardware, small parts, and service
supplies that are typically dispensed from parts drawers or bins.
Don't Clutter: So as to make for maximum work space, have as many
storage units be located off the bench surface as possible. Don't allow your
work surface to become a "storage" bench by cluttering it with items that
should have a better home. The idea is to leave as much work surface space
as possible.
An Exception: If small parts drawers must be close to the work
surface, a major issue with them at bench level is that work must be moved
aside in order to gain drawer access. It is better to arrange for them to
be mounted to the wall or placed onto a raised bridge across the back or
side. This is to allow for work room underneath, or as a possible place
for certain test equipment.
Under Bench: Have large parts used most often be close to hand in
drawers or bins directly beneath the bench. If you find there to be a lot of
wasted room above one or more bins, install shelves with just enough room to
accommodate the bin height. This will allow more bins in this area.
If the under-bench space is deep, buy or make bins that will make usage
of that depth. To prevent accidental dropping of a bin because it is pulled
out too far, colour the last 20 centimetres a different colour so workers
will know to stop pulling the bin. An alternative, is to install rods at the
back of each bin that stick up to engage a wooden strip under each shelf.
This would mean more shelf height would be required, though.
Having separate and well designed
bench setups makes your shop time go
smoothly and easily. This facilitates good work
habits, which in turn lead to solid, long-lasting repairs.
This Discussion is
Available in
Plain Text for
Your Archives
Work Bench Setups, Text Format


