
AIEL Shop Tips
WORK SPACE POWER
|
|
For most work spaces, electrical installation will
be a consideration, even if only for shop lighting
and power tool requirements. This short discussion
will lay out a basic electrical distribution for
a stage lighting shop. It assumes that you are
putting in power for the first time rather than
renovating an existing situation. Scale the methods
and suggestions to fit your requirements.
|
|
INFORMATION BELOW MAY
NOT BE REPRODUCED
WITHOUT PERMISSION
FROM THE AUTHOR ©
|
Be aware neither Atlantic Illumination, nor its owner
and employees will be responsible for any problems
encountered as a result of following or not following
the procedures here. This is only a guideline. You
must decide the suitability of the steps given, and
be responsible for the results of your own work.
|
Topics
ELECTRICAL REQUIREMENTS
Learn what is Safe and Legal: Get an electrical book, or speak to
an electrician regarding cable types and sizes for each circuit. In Canada,
20-amp lines should be 12 gauge, while a 30-amp line requires #8, and a 60
amp line, #6 cable. The lower-amperage circuits will terminate in typical
U-ground outlets, while the higher-amperage circuits will likely terminate
in connectors you'd use to hook up a portable power tap or dimmer rack.
Study your local the electrical code to be sure what you wish to install
is legal, has the proper cable type, and is correctly wired. You may also
consider ground-fault circuit interrupter (GFCI) outlets for additional
safety. These trip faster and will isolate both the hot and neutral lines
from the load when they do.
ELECTRICAL CONSIDERATIONS
After fashioning your shop layout, as discussed in the
Work Space Design article, you will need to
decide how much and what types of power you'll require. The minimum is two
separate circuits -- one for lighting and one for tools/testing. Individual
work and lighting circuits are recommended so that if you trip the breaker
on the work circuit, you won't be in the dark.
This discussion will focus on outlet setups, while
power for lighting will be found in our article on
Area and Task Lighting.
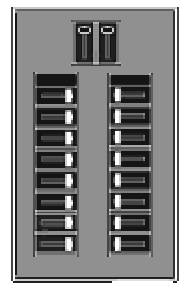
Shop Electrical Panel: Whether you are bringing in just these
two circuits or multiple ones, it is best if you can install a breaker panel
right inside the shop. The nature of testing lighting often means that a
breaker will eventually be tripped. It's convenient and time saving if that
breaker is within, or at least very close to, the shop. This is so you
won't have to go far to restore power. In a larger shop where the panel may
be some distance away, label the switch and outlet with the panel and
breaker numbers so there will be a minimum of delay during the resetting
process.
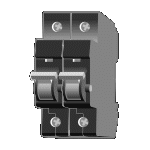
Circuit Quantity: As a realistic minimum for a medium-sized shop,
four to six 15-, or preferably, 20-amp circuits, and one 30- to 60-amp
circuit are suggested. The first ones would be for lighting and for bench
and work station power. Another might be for a paper-work and computer
station, if you've set up one. The high-amperage circuit will be your test
outlet for dimmers and high-wattage lights. Separate circuits means no
disruption to other circuits should one breaker be tripped.
Outlet Orientation: Realise that electrical code in Canada
specifies the ground connector of each outlet be oriented upward when the
outlet is installed vertically. This is especially important when the cover
plates are metal. Should the plate ever become loose and drop down to
contact the pins of a plug in the outlet, the plate will touch the ground
pin of that plug first. In addition, should a plug not be fully inserted
into an outlet and a metal object such as a screw driver falls between the
outlet and its plug, that driver will touch the ground pin and not short
the hot and neutral pins.

For individual outlets or strips placed in a horizontal position, the
neutral side should be up whenever possible. This means that ground
connectors would be on the left for a Canadian electrical outlet. So in
the same situation as above, a screwdriver would contact the ground and
neutral pins, and since ground and neutral are (theoretically) at the
same potential, the breaker would not trip. Now, due to leakage current and
resistance in the wiring, there may be a small potential difference between
the two that might cause a Ground Fault Interrupter Circuit (GFCI) to trip,
but in other cases no harm will result.
BENCH POWER

Power Strips: After setting up general and specific lighting for
your work benches, as discussed in
Area and Task Lighting, install an outlet strip
along the back of the bench designated for electrical work. Do not put it
along the front! Working at the bench and touching a live contact while
leaning against a metal electrical strip will result in a severe shock. As
well, having the cables for various devices winding their way to the front
of the bench contributes to clutter. Remember that the ground connectors
should be oriented to be on top.
A strip along the back assures safety and convenience. It places a
receptacle every few centimetres which avoids all cables running to one
central outlet box. Mount this strip well up off the bench so that it's
accessible should the bench become crowded with tools, meters or cabling
while working on a project. Many of our power strips are as far as 20
centimetres above the work surface. (Look for these strips in the
AIEL Shop Photo Tour.)
Switched and Variable Power: Next, set up a switched outlet for
simple tests. You may wish to have a variable-voltage outlet, as well. (This
cannot be a GFCI type.) Be sure to use an autotransformer for this and not
a solid-state dimmer. The transformers can handle much more electrical abuse,
and they will give a smoother voltage curve with better resolution. Also,
solid-state dimmers may cause interference with some electronics under
test. Attach a voltmeter to this circuit for monitoring purposes.
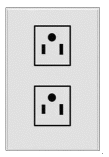
Location of Switched/Variable Outlets: Test outlets may be at the
bench front for access from the floor, but place them off to one side or
onto the side of a bench leg. If they must be at the front, recess them
enough to prevent contact by personnel during testing procedures. The
relevant switch for each outlet should be adjacent to that outlet so there
can be no confusion. As well, one may see whether a device is plugged in or
not before the switch is used. We like to have each switch be horizontal so
that it moves left and right. This way, it points directly to its outlet
when it is on.
Soldering Iron Outlet: Consider a third switched outlet for a
soldering iron. These rarely have a pwer switch, so it's a nuisance to
plug & unplug it each time. A switched outlet is the answer. Place an
indicator light on its box (if not on all electrical boxes), and wire it
in series with the switch. This is so you may see at a distance if you
have left the iron on. Green is the recommended colour for when this and
similar outlets are in their powered states.
Glue Gun: As above, these rarely have a power switch. It's common
to forget it's on, which not only wastes power, but also glue will leak out
when it's in a liquid state. Again, a switched outlet promotes safety and
frugality. As always, a prominent, illuminated indicator is a must for
this type of outlet so at a distance, one can see if the glue gun, soldering
iron, or other potentially dangerous device has been left on.
Other Indicators: For the variable-voltage outlet, use an LED or
incandescent light on the output side to indicate general voltage levels.
It is also a good idea to have another, different coloured indicator light
on the 120-Volt (input) side to let you know that the transformer itself is
energized. Green is suggested for 120-volt power, and yellow for the
variable side.
A Good Power Setup should Provide Convenience,
and Make for a Safe Testing and Working Environment
This Discussion is
Available in
Plain Text for
Your Archives
Work Space Power, Text Format
|
Now return to the
Work Area Setup Table of Contents
for other articles regarding specific aspects of shop design.
|
|
To see some of these ideas in
everyday usage, take the
AIEL Shop Photo Tour.
|
Return to the
Shop Tips
Table of Contents
|


