
AIEL MARKET
Purchase Guide
ADHESIVE TAPES
for the
PERFORMANCE INDUSTRY
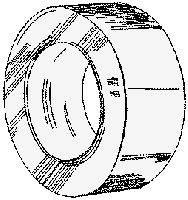


Essential to the performing arts is Adhesive Tape. Used for a
variety of purposes such as to mark items or the stage, secure
guitar pedals to the floor, hang backdrops, make repairs, or to
generally hold together anything for a temporary purpose, no
road crew or other technicians should be without a selection
of tape types and widths in his or her ready-for-anything kit.
Presented in this article is basic information about tape products
available for performance purposes. Included are typical widths,
lengths, colours, and uses. Recommendations, cautions and
warnings accompany each type where they apply. Not all
tape types will be discussed; only those that are most
commonly employed by crews across the industry.
Afterwards, storage suggestions will be given
and then a series of tape tips will be presented.
THE FOLLOWING MAY NOT BE REPRODUCED
WITHOUT PERMISSION FROM THE AUTHOR ©
ADHESIVE TAPE TYPESCable Tape Duct Tape Electrical Tape Gaffer Tape Gun Tape Luminescent Tape Masking Tape |
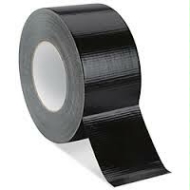
![]() This product is a wide version of Stage Tape. It
is meant to secure individual cables to the floor or wall when several of
them are side by side. It is also employed where its width presents an
advantage over regular Stage Tape, such as smoothing and securing carpet
edges, or when dealing with heavier items as exampled by backdrop hanging
where that extra area of gripping surface is required.
This product is a wide version of Stage Tape. It
is meant to secure individual cables to the floor or wall when several of
them are side by side. It is also employed where its width presents an
advantage over regular Stage Tape, such as smoothing and securing carpet
edges, or when dealing with heavier items as exampled by backdrop hanging
where that extra area of gripping surface is required.
Sizes: Widths are 72 to 100mm, but some manufacturers sell wider rolls. Although shorter and longer rolls can be found, lengths are usually 50 or 55 metres.
Colours: Black is favoured, but other colours are made by manufacturers, including fluorescent. Some crews prefer a lighter shade because the tape is more visible where it crosses doorways, or because it can be written upon with a black felt-tip marker. A version with reflective backing is also available. This is considered to be Threshold Tape because it is used where potential trip hazards across doorways must be made noticeable. Threshold Tape fits the situation due to its high visibility.
Frugality: Cable Tape is a money saver; instead of using three side-by-side strips of 48mm tape to bridge a group of cables, laying two strips of 72mm will save time, and the cost is less than three rows of an equivalent 48mm tape.
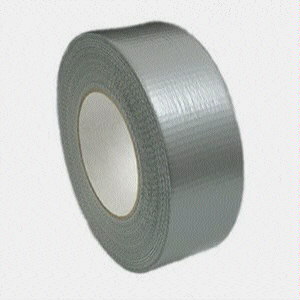
![]() Many performance-oriented tapes seem to fall under the general term of
"duct" tape which uses a cloth backing of various materials on to which an
adhesive is applied.
Many performance-oriented tapes seem to fall under the general term of
"duct" tape which uses a cloth backing of various materials on to which an
adhesive is applied.
History: A tape was apparently employed by World War I soldiers for temporary repair of their military uniforms which were made from duck material, a high thread-count version of canvas that was water repellent. It became known as "duck tape". (Another version relates that the name came about because it repelled water in the manner as that of a duck.) Eventually, soldiers and others found numerous uses for the strong, and water-resistent product.
However, the version of the product we know today was supposedly developed during World War II. It used duck cotton as the basis of its backing which was then coated on one side so as to repel moisture, while the other was coated with adhesive. This product had apparently first been used to seal boxes of ammunition because it made them easy to open by a simple peeling away of the tape. This product was also used by the military for various waterproofing and repair purposes. Because of the material and/or the fact that it repelled water, it was still known as "duck tape".
Then during or just after World War II, this tape came to be used by contractors to seal duct work in both heating and cooling systems, hence the "duct" name. It fell out of favour after better heat- and cold-resistant tapes were developed. The name has lived on despite professional contractors no longer using it for that purpose.
Locations: Because Duct Tape repels moisture, it can be placed in outdoor or in wet conditions provided it is applied when surfaces are dry. Some versions are additionally poly coated so as to enhance outdoor durability. However, standard Duct Tape will still not last as long in outdoor elements as some of the other types discussed on this webpage.
For stage purposes, Duct Tape will work, but it has a number of inherent problems which ultimately make actual Stage Tape much more suitable -- and probably less expensive in the long run. (See "Disadvantages" farther on.)
Sizes: Typical lengths are 50 to 55 metres, but shorter lengths in the range of 30 to 35 metres are not uncommon, and the lowest quality can be as short as 2 metres. Widths are usually 48mm, but other sizes can be 24mm and 72mm, and recently even more narrow.
The widths above are slightly narrowed versions. They used to be ~ 25, 50, and 75mm. This reduction adds up over the length of a roll times thousands of rolls, to be a cost saving for their manufacturers. Slightly narrower tape may have little effect regarding its end purpose, but it smacks of downsizing so a manufacturer can make more profit, or appear to offer a lower priced roll. Where it costs a tech crew is when tape strips must be placed side by side to cover something. The narrower tapes may mean an extra strip has to be used at least some of the time. In such situations, a wider tape is recommended rather than using multiple, narrow strips.
Colours: Duct Tape used to come in one colour: grey, but manufacturers have now expanded that to many other colours. If you have a need to identify the purposes of Duct Tape usage, choose colours to suit.
Uses: Employ Duct Tape for light-duty purposes where the up-front cost must be kept low, and the possible lack of colour choice is not a factor. Choose it for temporary purposes so that left-over glue due to long-term adherence does not become a problem upon removal.
Don't use the cheapest Duct Tapes because they typically leave glue residue on surfaces even after short periods. In addition, these cheap tapes are more likely to shred when unspooled from the roll, and when being removed from surfaces. Realise though, that there are higher quality versions which have become available for those not needing an actual, high-quality Stage Tape, but want the advantage of a cloth-backed adhesive tape.
Disadvantages: The first problem with Duct Tape is that it is a thin, cloth tape usually with a coarse weave. This makes for a weaker tape regarding stage purposes. As mentioned, it can shred when removed after a show, or even when just being torn from the roll. Because of this, threads can be left hanging, and they can remain behind after the tape is removed.
Another problem is that few Duct Tapes can handle temperature extremes
well. Thus, glue is often left behind because the adhesive will separate
from the backing when the tape is removed after usage -- particularly if
the tape has been on a surface for a prolonged period of time.
Warning
Recently, very cheap Duct Tapes have arrived to the marketplace
that come in a variety of colours. Usually the rolls are only a few
metres long, and are actually considerably more expensive per
metre than that of a full roll. (See the
Electrical Tape purchasing
Example so you can calculate how much more expensive.)
Since the quality of low-cost versions of this product is almost
universally inferior, it is recommended that you stay away
from Duct Tape for all but the most temporary, and
the least demanding of stage purposes.

![]() A Polyvinyl Chloride (PVC) product, this stretchy tape with a rubber
adhesive will make a tight wrap around objects. The 7-mil grade is rated
at 600 volts dielectric strength. It comes in a wide variety of colours,
and it takes felt-tip marker ink well without bleeding. This tape is
waterproof, and thus can be used outside or in moist conditions as long as
it is put on when the surface is dry. Stretch and wrap this product tightly.
A Polyvinyl Chloride (PVC) product, this stretchy tape with a rubber
adhesive will make a tight wrap around objects. The 7-mil grade is rated
at 600 volts dielectric strength. It comes in a wide variety of colours,
and it takes felt-tip marker ink well without bleeding. This tape is
waterproof, and thus can be used outside or in moist conditions as long as
it is put on when the surface is dry. Stretch and wrap this product tightly.
Sizes: Widths range from about 12 to 20mm. 48mm is available, but usually only in black. A typical roll length is 20 metres, although shorter lengths are more common.
Colours: Colour selection is wide. This makes it very suitable for colour-code marking. Some even use it to designate cable lengths, but it's too hard for a pickup crew to learn each company's length coding. (Yes, some companies use the electronic resistor-code standard, but one can not be sure that this is the code being used -- and how many pickup crew members actually know the resistor code?)
Instead, we use strips of red-red-blue tape on all our cables (among other articles) as one way to designate the company's ownership. Each cable's length is displayed by writing in black felt-tip marker right on each connector as `n' metres.
Uses: Most road crews employ this product for its intended purpose to insulate electrical connections. However, it is also used as an identifying mark, as just discussed, and for coiled-cable securing. The latter purpose is not recommended, though. Good Electrical Tape usually doesn't leave glue (unless left on for too long a time or if the cables are stored in a warm area), but it can be hard to remove during a setup. Because of its stretchiness, one must often have to cut the tape; this slows down setups -- plus such usage is wasteful. Instead, use cordage to secure cable coils. (See the AIEL Cordage Guide.)
Down-Sized Roll: Pay attention to these slightly shorter rolls; instead of 20 metres, one only gets 18. The two metres short in this example represent a price increase of 11.1%. This is a lot -- way above the inflation rate here in Canada!
There are rolls that are shorter than the above, as well. Typically, these are found in variety packs. It is suggested to stay clear of discount-store tape packs that contain a number of short rolls, each a different colour. The quality seems to rarely be high, and even when it is, the lengths on each roll are so short that the price is often considerably higher than if one bought a full-length roll. Price and cost do not always equate!
Figuring Value: Here is a quick formula to determine if the price on that package is higher than the full-sized roll you recently bought. Ignoring sales taxes (which balance out), do the following calculations to four decimal places:
This means to take a Package price (P$) before taxes, divide it by the Package's number of rolls (Pnr), then divide that by the Length of one of its Rolls (Rl1). This will result in the cost per metre for the package. It may be a small, decimal number, but don't be concerned. Now, multiply this small number by the Length of a full-sized Roll (Rl2).
If the answer is a price higher than the price for the full Roll, you are paying too much for the Package. Essentially here, one is calculating the price of a full Roll at the per-metre cost of the package. If the price is more expensive, the full Roll is cheaper because the result of these calculations is based on what the package is charging for its product. Essentially, the Roll's cost per metre is less than the Package's price per metre. Doing this calculation will tell you by how much.
Example:
 Compare a package that retails four,
  two-metre rolls priced at $1.00 versus a
   20-metre roll at your cost of $1.50:

        1.00 / 4 / 2 X 20
The answer is $2.50 -- over 1.6 times more than you currently pay for the longer roll! In this example, the full roll would be $2.50 based on the cost of the package, but you are paying only $1.50. To sell this example package at your roll's cost, it would have to be priced at $0.32, not $1.00. Buy quality, full rolls; they're cheaper, and they provide a much more professional product with which to work.
Even should your roll turn out to be more expensive, one should question the quality, and therefore the suitability, before deciding on the cheap package. I have tried a few of these from different stores just to see what the tape was like regardless of cost. None I have ever encountered was worth using for professional purposes.
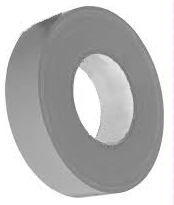
![]() A product associated with the motion picture industry (hence its name),
it is typically the highest quality tape available for performance purposes.
It is a 7- to 14-mil cloth tape with a matte finish, and has a superior
rubber adhesive. The backing is very flexible and is woven with a high
thread count. The best products tear very easily by hand, and without
shredding.
A product associated with the motion picture industry (hence its name),
it is typically the highest quality tape available for performance purposes.
It is a 7- to 14-mil cloth tape with a matte finish, and has a superior
rubber adhesive. The backing is very flexible and is woven with a high
thread count. The best products tear very easily by hand, and without
shredding.
Gaffer tape is designed to be removed easily without pulling paint or harming surfaces. No residue remains under most all conditions. However, tape left on for extended periods and/or that has been subjected to temperature extremes can result in some adhesive being left and/or some pulling of surface materials, but this is not the norm.
Sizes: Although available in a variety of widths, the preferred seem to be 72mm or 100mm by motion picture crews. However, 48mm should be sufficient on the theatre stage, and widths of 24mm or narrower are also available. Lengths are usually 25 to 55 metres.
Colours: The most popular colours are matte black or matte grey, but the colour variety is wide, and even includes fluorescent and one with a "Cable" warning printed on it.
Uses: Recommended as the best product for when reflections
from the tape back must be kept to a minimum, where strength is a major
requirement, and easy removal without surface damage is a desired feature.
Outdoor usage and high-temperature capability are also common abilities.
Some of these tapes can withstand 90 degrees C and higher. Depending on
the type, Gaffer Tape can be left for long periods outside as it repels
moisture and can handle UV rays.
Warning
Some retailers will market inferior tapes as "gaffer", with a
correspondingly lower price. Be sure when wanting
true Gaffer Tape, that you actually receive it.
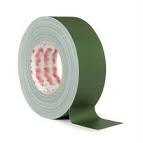
![]() Used by the military (at least in Canada), Gun Tape is a middle product
between Duct Tape and true
Stage Tape. It is waterproof, has a tight weave and
good adhesive.
Used by the military (at least in Canada), Gun Tape is a middle product
between Duct Tape and true
Stage Tape. It is waterproof, has a tight weave and
good adhesive.
Sizes and Colours: Widths are usually 24, 48 or 72mm, with lengths in the 50- to 55-metre range. Colour is drab green in light and dark shades.
Counterfeit: Beware of cheaper tapes appearing to be Gun Tape (especially from low-quality surplus outlets). They come in a colour similar to military green, but are inferior. Some of them shred easily when being dispensed from the roll, and some may also leave glue behind after removal. Typical clues to identify poor quality in these tapes are coarsely-weaved backing and unevenly-coated adhesive.
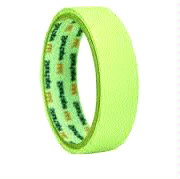
![]() Commonly referred to as "Glow Tape", it is used as an identifier, as
can be Electrical and Masking
types. However, it has a phosphorescent coating that will absorb light,
especially from the blue/violet part of the spectrum, and then re-emit it
for a period of time to be able to been seen in the absence of light. The
usual, emitted colour is a bright, whiteish green.
Commonly referred to as "Glow Tape", it is used as an identifier, as
can be Electrical and Masking
types. However, it has a phosphorescent coating that will absorb light,
especially from the blue/violet part of the spectrum, and then re-emit it
for a period of time to be able to been seen in the absence of light. The
usual, emitted colour is a bright, whiteish green.
Sizes: Typical widths are 12 to 25mm, although 50mm is available. Rolls are typically only two to fifteen metres in length due to the high price of this tape.
Uses: Any place in a performance space with little or no light is a possible location for Glow Tape. It is used to define backstage walkways, as well as to indicate hazards in locations which must be kept completely dark, such as areas close to an audience's view. Actors which must enter or exit in a blackout welcome the definition of stage furniture and sets that is provided by this tape.
Emission Time: Buy quality Glow Tape. It will remain bright enough to last the length of a performance and beyond. Cheap Glow tape typically has inconsistent coatings, glows with a duller colour, and will only be useful for a half hour or so. (Some industry people have commented that one product is so poor as to glow usably for only 10 minutes!)
Extended Emission Time: To achieve continuous glow times, some theatres will use a low-wattage, blacklight-blue, or LED ultraviolet light source to make the tape glow all the time and to maintain its brightness. This is a waste of the Stage Accessories Budget because Glow Tape is unnecessary where an excitation light source is always present. Given that this tape is often ten to twenty times the cost of fluorescent Masking Tape, use the latter instead. If this method is employed, shield the UV sources well so as to not produce visible glow to an audience. Also consider using Shipping Tape to protect Glow or Fluorescent tapes when placed in traffic areas.
Warning
Be aware that Fluorescent Tapes (and similar products) are often
labeled as "glow in the dark", as well as "neon". Neither is true.
In order for them to fluoresce, an energy source must be
present all the time. However, once Luminescent Tape
is charged, it glows with no external energy present.
If the latter is what is required, Fluorescent Tape
cannot be used; it won't work for that purpose.
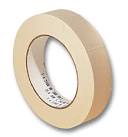
![]() One of the lightest tapes used on stage, it is meant to be employed by
painters for masking purposes; that is, to keep unwanted paint off surfaces
while making a specified line around moulding, or between a wall and a
differently-coloured ceiling, and so on. This tape is made to be thin so
that noticeable paint lines will not be left when it is removed. However,
this property means it typically tears too easily, unless a quality tape
with a thin, yet strong, backing is used. (There is a higher quality
Painter's Tape now available that does not tear as
easily.)
One of the lightest tapes used on stage, it is meant to be employed by
painters for masking purposes; that is, to keep unwanted paint off surfaces
while making a specified line around moulding, or between a wall and a
differently-coloured ceiling, and so on. This tape is made to be thin so
that noticeable paint lines will not be left when it is removed. However,
this property means it typically tears too easily, unless a quality tape
with a thin, yet strong, backing is used. (There is a higher quality
Painter's Tape now available that does not tear as
easily.)
Masking Tape is also designed to not stick well; this is so that it can be easily removed without lifting the paint underneath. Thus for stage purposes, it may not stick well enough. Contrary to this is in recent decades, manufacturers have come out with stronger grades of Masking Tape because users were employing this product in many ways other than for painting. Try before committing to a large purchase to be sure the grade you buy is suitable for the use you intend.
Sizes: Widths range from about 12 to 75mm, but some contractors' rolls can be as wide as 100mm. Lengths are usually around 50 metres. Shorter rolls can be as low as 5 metres. Because it is such a popular tape, you may find manufacturers that make widths and lengths out side of those ranges, too.
Colours: A wide variety of colours (including fluorescent) is available from which to choose if you decide to use this type of tape for marking and/or colour-coding purposes. However, the standard light beige remains the most popular.
Uses: Employ this tape for temporary marking purposes. It takes felt-tip marker ink well although the writing will bleed somewhat, making for less legible figures. You may also use it in the short term for keeping small coiled cables together. It is fairly inexpensive, rips from the roll easily, and leaves no glue behind (unless you use a poor-quality product or leave it on for a long time, especially in hot conditions).
The positive qualities of this tape are a plus for those using it to secure cable coils because no stickiness results, and the coils will come apart easily during the next setup. (However, a better method is to employ permanent ties on each cable -- see the AIEL Cordage Guide.)
Disadvantages: It does not perform well in the presence of
moisture or in locations where the temperature is much out side of room
levels. If the location is too cold, the tape will not stick; if too warm,
the tape will leave glue behind when removed, especially, as already
mentioned, if it is left on a surface for too long.(*) Also, this tape's
ease of removal and tear-off from the roll means it may shred too easily
at unwanted times. Shredding is also a problem when removing the poorest
of quality tapes.
(*) There is a high-temperature resistant Masking Tape now available.
|
Cautions Regarding newly-painted surfaces, do not leave Masking or Painter's Tape on for long periods of time before removing. Adhesive may be left behind, or paint might be removed. Follow the manufacturer's time-limit recommendation. When removing either tape, always do so when it is not too hot or cold; 15 to 20 degrees C is a good range. When removing from freshly-painted surfaces, pull slowly while watching the edge as it comes off the surface. Not heeding these precedures may result in the removal of paint from the surface underneath. |

![]() This product is used by audio crews to attach headset microphone booms to
a performer's cheek. It is preferred because it will adhere to skin better
and longer than any other tape discussed on this webpage. When a performer
wears a headset-mic, it must be kept at the proper distance from, and
orientation to, the mouth. This is especially important for active persons
such as dancers and acrobats, or for those who will be engaged in a stage
fight.
This product is used by audio crews to attach headset microphone booms to
a performer's cheek. It is preferred because it will adhere to skin better
and longer than any other tape discussed on this webpage. When a performer
wears a headset-mic, it must be kept at the proper distance from, and
orientation to, the mouth. This is especially important for active persons
such as dancers and acrobats, or for those who will be engaged in a stage
fight.
Even for other performers, it is desirable to make sure that the microphone element does not encroach upon the mouth or nostril; otherwise, breathing sounds will become very evident to an audience. Also, it's important that the element not rub or strike against the cheek so as to avoid similar results, and that it be kept far enough out so as to prevent, or at least reduce, distortion during loud vocalisations.
Sizes: Widths range from 12.5 to 25mm, with a typical length of 9 metres.
Structure: Microphone Tape's colouring and its see-through nature allow it to blend with caucasian skin colour to make it less obtrusive to audience members. (For other skin colours, darker shades are available by special order, or you could use a more transparent tape.) Its box-weave construction assures maximum strength, and the hypoallergenic nature of the adhesive prevents skin reactions. Because the backing is porus, air and moisture pass through; so the tape remains on the face without perspiration building up which would result in loss of adherence. Yet, it is easily removed without causing damage to skin tissue.
|
Caution Be wary of cheap tape; the box weave may shred to leave threads of material hanging. These low-cost tapes also might leave glue residue on the skin, and may become gooey with skin moisture and body heat. The price of better quality is such a small difference for the quantity typically used for each performance so as to easily justify itself. For the small extra cost, using a premium tape also negates other frustrations encountered when using a poor product. (See Medical Adhesive Remover in the AIEL Lubricants and Solvents guide.) |
![]()
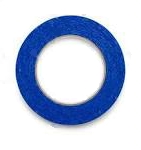
Now preferred by scenic painters, this is a more robust Masking Tape that, if using the better quality product, does not shred, and still removes easily with no surface damage provided it was not there long term.
Sizes: Widths are typically 25 to 48mm, but range from 12 to 100mm. Lengths are usually 50 metres, but contractors' rolls can be longer.
Colours: This tape is almost always green, blue, or orange but limited other colours are available from a few manufacturers.
Some stage management teams use this for colour coding (if fewer numbers of colours will suffice), and as a cheaper alternative to Spike Tape. However, actual Spike Tape will adhere to floor surfaces where performers tread much better than Painter's Tape. (See the Spike Tape discussion for more on this point.)
Painter's Tape is designed to be easily removed if the manufacturer's directions are followed. There are different grades based upon how easily the tape can be removed. This is important if the surface underneath is the final one. In order of ease of removal, they run:
- Spider
- Green
- Blue
- Orange
Realise that not all manufacturers follow these colour-versus-grade designations; some simply colour their tapes as selling points. Test by buying one roll to see if it suits your purpose.
|
Cautions Be selective; cheap Painter's Tapes are on the market that shred too easily, and the adhesive used is often not sticky enough to hold well on some surfaces. In addition, some have poor quality backing that curls up at the torn ends. The latter especially happens with those tapes using a low-stick adhesive. Having said this, be aware that the lightest grades of Painter's Tape are designed to be thin and to remove easily, so choosing between a quality brand versus just a poorly-made product can be difficult. Test single rolls first so as to decide upon the brand and grade that works best for what you require. As with quality Masking Tapes, the best Painter's Tapes get the balance right. The backing is strong enough not to shred, but is thin enough not to leave a paint line. The adhesive is powerful enough to stick well, but won't pull paint up when removed. In addition, the ends won't curl up off the surface. Even with quality tape, follow the suggestions given in the next two paragraphs. Do not leave Painter's or Masking Tape on surfaces beyond the manufacturer's recommended time limit. Adhesive may be left behind, or the previously-painted surface releasing some of its paint. When removing Painter's or Masking Tape, always do so when it is not too hot or cold; 15 to 20 degrees C is a good range. When removing from freshly-painted surfaces, pull slowly. Not heeding the above may result in paint being removed. |
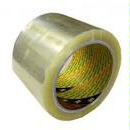
![]() A transparent tape meant chiefly for securing shipping cartons, this
does find its way to the stage. Some use it as a very cheap alternative to
the other tape types discussed on this page. However, the versions most
seen in retail stores rarely stick well, or for very long, when used for
stage purposes. An exception is that even the low quality tapes will stick
to very smooth surfaces such as counter tops and metal lockers or shelves,
while the better, but still not high quality, products will adhere to
paper or cardboard, which is its intended purpose.
A transparent tape meant chiefly for securing shipping cartons, this
does find its way to the stage. Some use it as a very cheap alternative to
the other tape types discussed on this page. However, the versions most
seen in retail stores rarely stick well, or for very long, when used for
stage purposes. An exception is that even the low quality tapes will stick
to very smooth surfaces such as counter tops and metal lockers or shelves,
while the better, but still not high quality, products will adhere to
paper or cardboard, which is its intended purpose.
Sizes: Product lengths vary widely from just a few metres to 50 metres, but up to 100 metres or even longer when used by professional shippers. Widths are typically 48mm or 72mm. The best Shipping Tapes will have thick backing to prevent shredding; look for something in the range of 2.5 - 3.5 mil and made of polyester. A tensile strength of around 15 kg or better will maintain the tape's integrity while it is being unspooled and applied.
Colours: A variety of colours is available, but when used for stage or shop purposes, the clear version seems to be the universal preference.
Uses: Employ this product to protect signs or similar when placed on to smooth surfaces. Some stage managers will use it to cover glow or Fluorescent Tape on a floor to protect those tapes from dirt and wear during long production runs. Use the highest quality product for this purpose, and use a thicker tape to prevent tearing by shoes and casters.
Disadvantages: Never use it outdoors or in temperature extremes unless you buy a top-of-the-line tape with acrylic adhesive. Ensure surfaces are free from dirt and moisture, and use a heat gun to warm cold surfaces before applying.
|
Cautions Always pay more to buy a quality product. Because discount store Shipping Tape is difficult to initially unspool and it shreds easily, your crew's labour will cost you in time and frustration while they fiddle to find the starting edge -- then cost more time during unspooling because it tears incessantly. This type of tape is also the most likely to leave adhesive behind, so if it is being used for purposes other than sealing cardboard boxes, make it very temporary. In addition, Shipping Tape is just not sticky enough to hold much weight, or at all suitable to keep cables on the floor from becoming a trip hazard. Finally, in dry weather Shipping Tape will exhibit static problems because of its thinness and material make-up. So when the tape is unspooled and the end released, it will tend to be attracted to itself or unwanted surfaces, or it will immediately fly to `grab' the intended surface before it is aligned. Under this same dryness, when applying the tape to labels or small signs and papers, as one approaches the surface with the tape, the label or paper will jump up to meet the tape and then stick in an unsatisfactory orientation. |
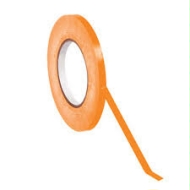
![]() Tape used for spiking (marking) the position of items on a stage is
normally narrow in width. It removes easily after a production closes,
leaving little to no glue, unless if temperatures vary too much outside
of those in a typical room, or the tape has been on for a very long run.
Tape used for spiking (marking) the position of items on a stage is
normally narrow in width. It removes easily after a production closes,
leaving little to no glue, unless if temperatures vary too much outside
of those in a typical room, or the tape has been on for a very long run.
Sizes: Typical widths are 6mm, 9mm and 12mm, although a 16mm width is available, which seems wide for Spike Tape. Roll lengths vary from 40 metres to 165 metres.
Colours: The wide variety of colours available for Spike Tape means that each item or group of items on a stage can have its own colour coding. So table spikes might use Yellow, chairs could be designated as Green, and so on. An alternative is to use a different colour for each act's items.
Substitutions: Some stage managers use the narrowest-width Painter's Tape, which is a better-quality, coloured Masking Tape. The issues with this are that felt-tip label markings on this type of tape can bleed, thus blurring the labels; and it is generally much more expensive than Spike Tape. In addition, since Painter's Tape is meant to be easily removed, it likely will not stick well enough or long enough for spiking purposes. A worst-case example is when it is used in areas with heavy traffic such as with dance troupes.
True Spike Tape: This is typically narrower than Painter's. It comes with flat or smooth backing. The flat tape tears easily by hand and adheres best, but usually exhibits the ink-bleeding characteristic written about earlier. The smooth-texture tape uses a vinyl backing which won't allow marker inks to bleed at all. This makes for completely legible writing (within the stage crew's penmanship ability, of course) so that persons working under dim lighting during set changes can easily discern which spike strip means what.
Vinyl Spike Tape does require scissors or a knife to cut, but this means a more robust product that can withstand months of a show's run. However, smooth-backed Spike Tape does not adhere as well on all surfaces, and thus is recommended best for smooth surfaces such as tile, varnished or laminate flooring. Remember to wipe the surface clean before applying either tape.
Some manufacturers offer fluorescent Spike Tape, although one must question the use of this on a stage in sight of an audience for some types of performances. However, where a bright, but narrow, tape is required, this could be an option.
Spike Tape removes very easily after a show leaving no residue, and the low cost for smooth-backed tape of around only 5 to 10 cents per metre makes it very affordable, even for the lowest of budgets. Cloth-backed spike tape runs double or more this cost.
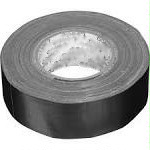
![]() True professionals use actual Stage Tape -- often referred to as
"gaff", but it is not necessarily an authentic
Gaffer's Tape. Stage Tape is the big brother of
Duct Tape in that it utilises a cloth backing and
strong adhesive, but to a much greater degree. Look for a high thread
count with a tight, fine weave, and good adhesive adherence. For extra
strength, select tapes with a thicker backing in the range of 10 mil or
better.
True professionals use actual Stage Tape -- often referred to as
"gaff", but it is not necessarily an authentic
Gaffer's Tape. Stage Tape is the big brother of
Duct Tape in that it utilises a cloth backing and
strong adhesive, but to a much greater degree. Look for a high thread
count with a tight, fine weave, and good adhesive adherence. For extra
strength, select tapes with a thicker backing in the range of 10 mil or
better.
Sizes: Common lengths range from a low of 5 metres up to 50 or 55 metres, but longer rolls are available. Widths are usually 48mm, but 24, 72mm and 100mm are available. The wider versions are typically considered to be Cable Tape or Threshold Tape.
Colours: Stage Tape is available in a very wide variety of colours and also in a matte finish. The latter is usually used as a less expensive alternative to true Gaffer Tape around film, video, and photography sets where stray reflections are a problem, but the full capabilities of actual Gaffer Tape are not required.
Strength: Sticking ability should be very strong, with the best formula being a synthetic rubber adhesive. Typically, a good tape is hard to unwind from its roll when at room temperature because of its stickiness. Examine the adhesive side of the tape. It should be smooth, free from hollows, and the backing should not be very visible through the glue coating. A quality Stage Tape holds well but can still be easily removed, to the point where it may actually be reused the next night!
Thickness: If you need robustness, get a thicker tape. These range from about 6 mil through 14 mil. For quick recognition, realise that for a given length, a roll of thicker tape will have a considerably greater diameter than that of a thinner, lower strength tape. Use thick tape where you need great holding power with no tearing. Be aware of thicker tapes that don't have correspondingly thicker adhesive. The backing will be easier to see through the adhesive side of a tape when there is too thin of a glue coating.
Coated Tape Backs: If it is to be in wet conditions, employ a tape with poly-coated backing. This plastic coating will give extra protection from moisture, and to some extent from direct sunlight deterioration when outside. Poly coating also adds to a tape's durability. We once used just such a quality Stage Tape to hold an amber gel on to a company vehicle's signal light. The lens had been broken by vandals and a replacement was unavailable. That gel and tape were there for over three years!
![]()
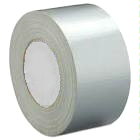
If cables must be run across a walkway or doorway and cable mats are not available, are unsuitable, or are overkill for just a few, small cables, use a Threshold Tape. It is wide, robust, and has a reflective backing so as to be visible to those approaching the potential trip hazard. This is very important in low-light areas where such a hazard is less noticeable, or where too many distractions draw attention away from the floor. Despite its cost, it is worth it because the durability of this tape makes it the best choice for something that will be walked upon or have cases or other wheeled items be rolled over it.
Sizes: Although 48mm Threshold Tape width is available, the most common are 72mm, 75mm, and 100mm. Lengths are usually 50 or 55 metres.
An Alternative: One might use a light-coloured Cable Tape, or even a fluorescent version, though the latter costs more. Realise that these tapes will not typically handle doorway traffic for as long as actual Threshold Tape unless one uses a high-quality product that is wide enough for the purpose.
STORAGE
Storage Methods |
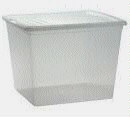
![]() Containers and Separators: Try to store tape in a thick
plastic or cellophane bag, or better, in a snap-lid plastic container.
Adhesives can, and do, dry out, or at a minimum become overly viscous.
Insert waxed paper sheets between each roll and the sides of the bag or
container. The separators will prevent the edges of rolls from sticking
to one another over time. If left long enough, such unseparated tape might
need a pry bar to get apart if the tape uses a high quality adhesive.
Containers and Separators: Try to store tape in a thick
plastic or cellophane bag, or better, in a snap-lid plastic container.
Adhesives can, and do, dry out, or at a minimum become overly viscous.
Insert waxed paper sheets between each roll and the sides of the bag or
container. The separators will prevent the edges of rolls from sticking
to one another over time. If left long enough, such unseparated tape might
need a pry bar to get apart if the tape uses a high quality adhesive.
Silicone Lubricant: Even waxed paper separators can still stick to tape if left too long in containers. As such, for long-term storage, it is suggested that you apply a light coating of silicone lubricant to the paper. Spray it on a paper towel and wipe each side of the waxed paper as you place it between each layer of tape and the container's inside surfaces. Use only a small amount because if it gets onto the back of the tape, it will become too slippery to grip, and thus, to tear off.
A stage lighting level of silicone spray is available from us, but a lighter-duty commercial version may be found at some hardware or automotive stores. The latter should be fine for this purpose.
Light Ageing: Keep Fluorescent and Glow Tapes in opaque boxes. Light, especially that from the sun, will reduce the life of Fluorescent Tape, and possibly some Glow-Tape coatings. When this happens, light emissions will be lower in intensity, and in the case of cheap Glow Tapes, may eventually reduce the length of usable glow-time after a charge.
TAPE TIPS
Simple Methods to have your Tape |
Buy a Quality Tape. Besides fewer frustrations from employing better tape, one can often get away with using smaller amounts than with a cheaper tape. Its usage can approach, if not equal or better, the economics of a cheaper equivalent. Better does not always mean greater expense.
A quality tape has a better backing material that won't shred when being unspooled from the roll. Shredded tape is then wasted when the tech throws it away and pulls off a fresh length. Also wasted is the tech's time dealing with tape that is shredding. This costs you more money. Apply your budget to quality tape, not to frustration!
Better tapes also use adhesives that won't dry out over time. This means longer shelf life because old tape will still be sticky when you go to use it in a year's time. It also means that tape in service will not peel off the object to which it is stuck and leave dried-out adhesive behind. Dry adhesive is very hard to remove.
Aged Products Rescue. If tape is not stored well, and/or if it is old, adhesive can become more viscous as time goes on. Should the backing be thin, it can part from the adhesive and/or shred as it is removed from the roll. This is annoying, tedious and time consuming to the person using the tape. So always use the oldest rolls first.
If you find a roll that exhibits this problem, you may be able to make it usable. Warm it up near a heater or in the sun for a bit. You might also try a hair dryer or heat gun. What ever method is employed, monitor the roll(s) to be sure they don't get excessively warm. Once hot enough, the adhesive may be more pliable and allow unspooling to proceed as normal.
Beware Downsized Rolls. Because product widths and lengths are not regulated (at least in Canada), one can find tapes that are both narrower and shorter than standard. For the same price, 48mm versus 50mm may not sound like much of a change, but it represents a 4% area reduction. One is being charged for tape that one is not receiving. As mentioned earlier, these narrower rolls have unfortunately become the norm.
Worse are the short rolls which have been downsized to 45 or 30 metres, with a non-corresponding drop in the per-metre price. Pay attention not only to quality, but also to how much you are paying per metre. That "bargain" may not actually exist.
Use a White Light Source for Glow Tape. Because Glow Luminescent Tape seems really bright under ultraviolet light, many assume it is best to excite (charge) this tape under that source. It certainly will work but it represents an unnecessary expense.
Phosphorescent tape coatings excite best in the blue/violet visible range, so use a blue light or white light that radiates well in the range of 300 - 450nm. A fluorescent Daylight or Cool White lamp is typically easier to come by than a UV source, although there are now LED ultraviolet flashlights available.
A more-recent light source that works really well is the high colour-temperature LED flashlight. These have a noticeably "whiter" colour and will give an excellent charge to Glow Tape.
Reduce Tape Wastage. Run cables along walls and the stage's floor edge to reduce the amount of Cable Tape needed. Use a cable mat where cables must cross walking paths. If tape must be used, employ quality Cable or Gaffer Tape, or Threshold Tape where cables must cross doorways. Study the following instructions for tape-saving tips.
Wipe and Dry Unclean Surfaces First. Tape sticks longer and better when it is applied to clean, dry surfaces. This may be especially important for some situations if you are using tapes that do not, or were never meant to, stick well. Use a dry, rough, cloth material to scrub away dirt and grime film. Clean the cloth often. If you wash the surface, be sure it is absolutely dry before applying tape. Employ a hair drier or heat gun to speed the process should time be short.
Wear a Sock on One Hand. Further to the above, use an old sock as your cleaning cloth. Wear it on one hand while tearing/cutting and applying tape with the other. To facilitate tearing, cut the foot of the sock a bit to allow your thumb and index finger to protrude. If you have much taping to do, such as spiking a large number of objects, this method speeds the task and saves putting a cloth down and picking it up for each operation. Remember to wash the sock after dirt accumulates.
If wearing a sock is tedious or hampers taping operations, use a soft glove with the finger tips cut out. One may grip and tear the tape properly while still being able to wipe surfaces with the palm.
Heat Cool Surfaces. Use a hair dryer or heat gun to warm cool and cold surfaces. Tape will stick better and longer when it is applied at room, or a slightly higher, temperature. Be sure to remove any moisture that might accumulate or run across as the surface is warmed.
Use a Wide Tape Instead of Multiple Narrow Strips. Wide tape has more surface area, so it provides better holding power. If several narrow strips are used to make up an equivalent width, they often must be overlapped. This reduces the amount of surface being covered, so the holding power is less. Realise that a line of tape that is on top of another does not touch the surface being taped, so only the tape underneath is doing the actual holding. A wider width eliminates this surface reduction.
Wide tape is a labour saver, too, because one need only tear off and place one strip instead of two or more. Finally, wide tape also costs less per area compared to an equivalent quality of narrow tape.
Protect Glow or Fluorescent Tape with Clear Tape. Where people are treading, place a layer of clear tape on top of less durable tapes so as to gain maximum service life. Use a quality clear tape because cheap Shipping Tape will not stick very long when abused by people's shoes. Keep the width to a minimum because clear tape becomes slippery when wet, and its shininess may be an issue for some stage productions. (See Shipping Tape.)
Press Tape to the Object, not to Itself. Apply tape so that it touches a floor, wall, or whatever, and then to the object to be stuck. This is the strongest method. Building up layer after layer of tape on top of itself does almost no good.(*) Think of a person hanging from a rope. If others grab this person's ankles, he will eventually be unable to hold on. However, if each successive person grabs the rope, all will be able to hang there up to the strength of that rope. So put as many pieces between an object and the adjacent surface to which it is to be secured as is necessary and feasible.
(*) The only advantage to placing one layer atop another is to reduce the chance of the lower layer(s) tearing. However, this situation is not typical as most tape failures arise from it being pulled away from one surface or another. The tape itself never tears if the chosen product is the right one for the task. That is, it can handle the weight or tearing force being placed upon it.
Use Cross Strips. When sticking an object, place strips of tape so that there are gaps between them. Then run a few strips at 90-degree angles to those so that the cross strips stick to the first tape strips and to the floor or wall in between. The first strips attach the object, while succeeding cross strips additionally attach the first tape strips to the surface to provide extra strength.
Use Rotated Strips. If the object being attached is leaning or pulling away, run strips from each opposite side of the object down underneath and then up the other side. At each adherence point, rotate the tape roll toward the adherence surface so as to form almost a 180-degree twist in the tape strip. Now run the sticky side underneath the object to the object's other side where another twist is formed and the end stuck to the adherence surface.
Do this again from the opposite direction and from other directions where possible, as needed. Add some cross strips at right angles, as discussed in the previous Tape Tip, to the points where the twisted tape attaches to the wall to give additional sticking strength. The idea is to provide extra support for the object from underneath, and that the tape adhesion point on each side will be at an angle that is less likely to be sheared away from the adherence surface.
Try to Never Remove Tape when it is Too Hot or Too Cold. Either scenario will often result in the separation of the backing and adhesive, leaving residue. Tape removal seems to work best in the 15 to 25 degree C range. Always use a quality tape to lessen the chance of glue left behind.
Understand that tape left on for long periods, especially when it has experienced temperature extremes, may result in residue when removed -- regardless if the temperature at the time of removal is ideal. Even quality tape can leave adhesive behind after long periods. If this is an issue, use a heat gun or hair dryer to warm the tape before removal. Do not overheat! Overly-hot tape will also leave glue when removed.
On Rough Surfaces, Press the Tape into the Pores. Uneven surfaces contain hollows and grooves where the tape just passes over. This lowers the surface's adhesion area. When utmost effectiveness is required, use your thumbnail or the smooth ball of a small tool handle to press the tape into those hollows so that it sticks to the bottoms and/or sides of each.
Make a Belt Hanger. If you use tape a lot during setup and want to have it handy, make a hanger which can easily attach and detach from your pants belt. For multiple rolls, use a small toiler-paper holder. Attach its bracket to a belt hanger. Your tape will always be at the ready by your side.
Personalise Your Tape. Use a felt-tip marker to put your initials or company name on the inside hub of the roll. You will then be able to identify your tapes from those belonging to others.
Fit Rolls to the Space. For those that wish to carry a smaller roll in a tool box, gig kit, or even a pocket, don't buy short rolls. These typically have only a few metres of tape and are expensive per metre compared to full-size rolls.
Instead, buy the large rolls, and as each gets to a diameter that will be fit inside the smaller space, take it out of service and replace it with a full-size roll. Put the partially-used roll into each smaller space while storing the remainder as replacements. This method means less money will be spent on tape.
Remove Left-Over Adhesive with a Suitable Solvent. Typical Stage Tape glues can be removed with Methanol, Mineral Spirits or Lacquer Thinner. Some glues may also respond to Medical Adhesive Remover. Before using any of these, be aware that they typically can cause chemical injuries to the skin and body mucous openings. Protect yourself, especially your eyes; and do not breathe the vapours.
Some of the above named solvents will also damage surfaces,
so test the solvent on a hidden area to be sure it won't discolour or
dissolve the surface under the removed tape. If there is a problem, choose
another solvent. If all is well, use a clean, tight-weave cloth to gently,
but firmly, rub at the adhesive. Turn the material to a clean area after it
pulls glue from the surface so it won't re-deposit the removed glue elsewhere
on the object. Treat small areas at a time.
See the AIEL
Solvents Guide
A FINAL CAVEAT
All tapes, regardless of quality, will leave residue on
some surfaces, in some temperatures, some of the time.
We Supply
Adhesive Tapes
Purchase AIEL
Stage Tapes
This Article is
Available in
Plain Text for
Your Archives
Stage Tape Guide, Text Format
|
Return to |
Return to the |
Return to the |
|
Go to the |
||